| 尚医通 | 您所在的位置:网站首页 › 源码vue 博客园 › 尚医通 |
尚医通
|
页面预览
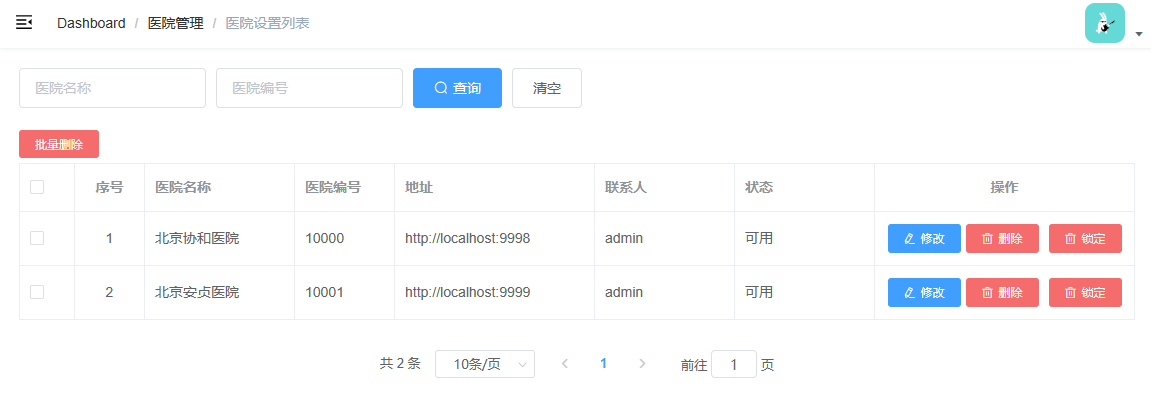
列表页面
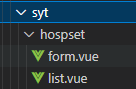
src/router/index.js 关键代码 import Vue from 'vue' //引入vue模块 import Router from 'vue-router' //引入路由模块 Vue.use(Router) //挂载路由功能到vue框架中 export const constantRoutes = [ ...... ] export default new Router({ ...... routes: constantRoutes }) 1.2、入口文件中调用路由src/main.js 关键代码 ...... import router from './router' //引入路由模块 ...... new Vue({ el: '#app', router, //将路由模块配置到vue对象上下文 store, render: h => h(App) }) 2、医院设置页面组件 2.1、创建vue组件在src/views文件夹下创建以下文件夹和文件
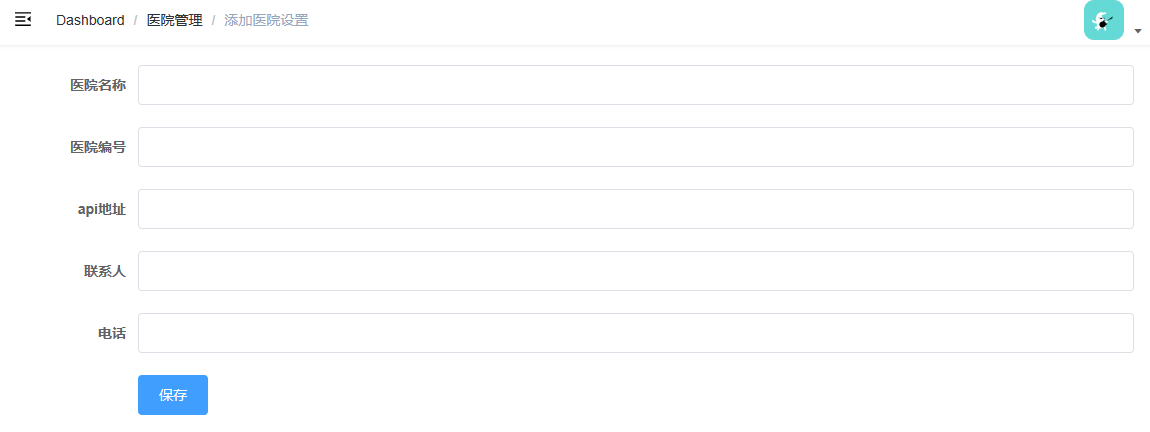
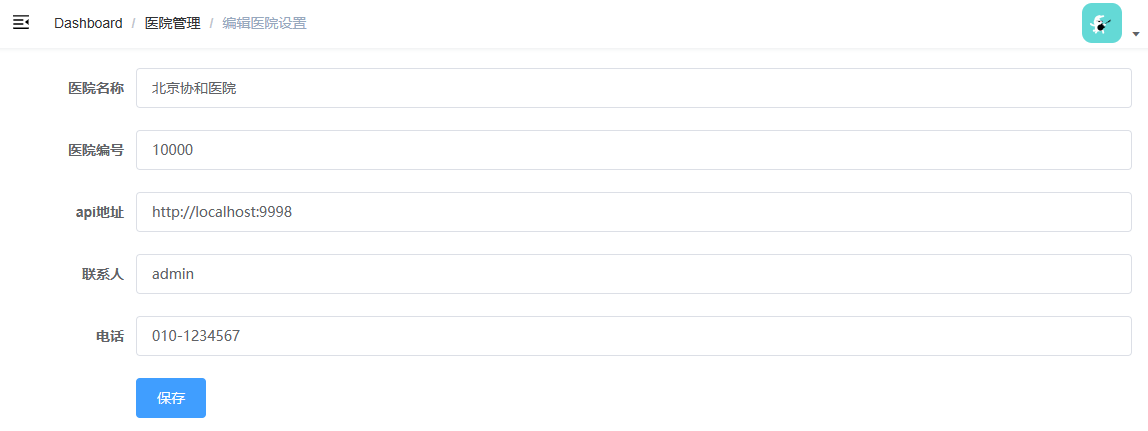
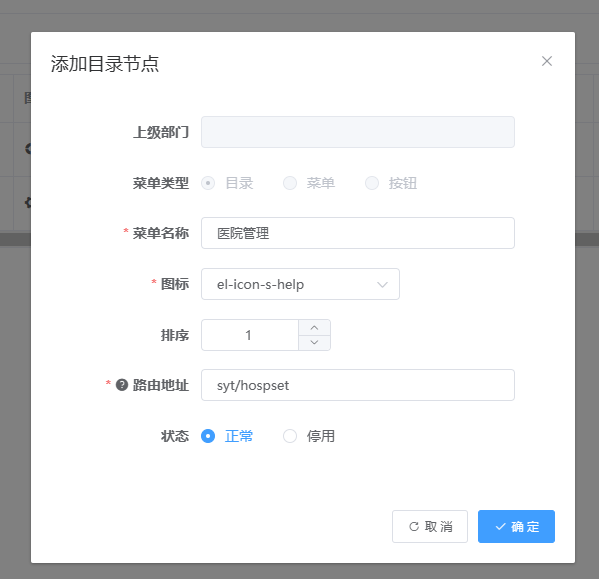
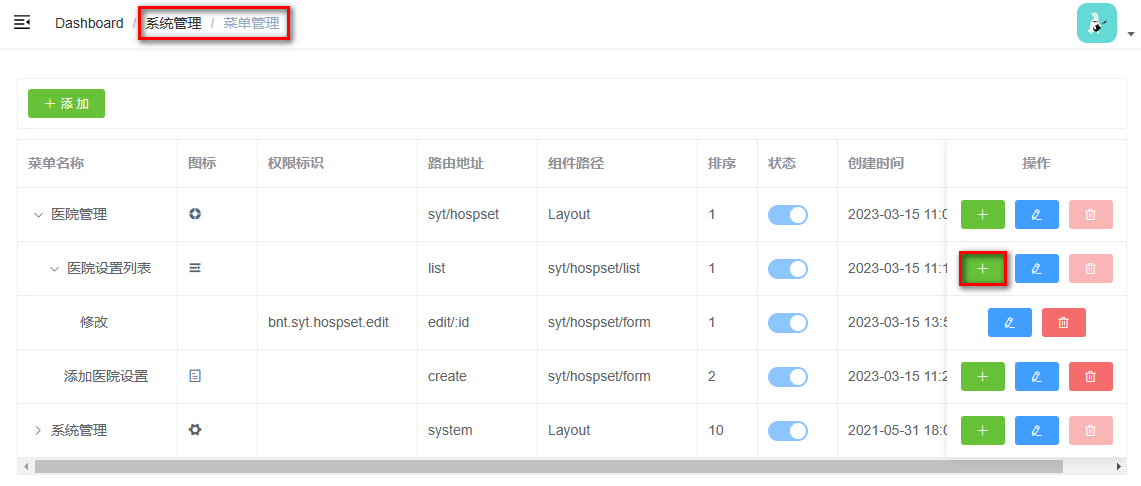
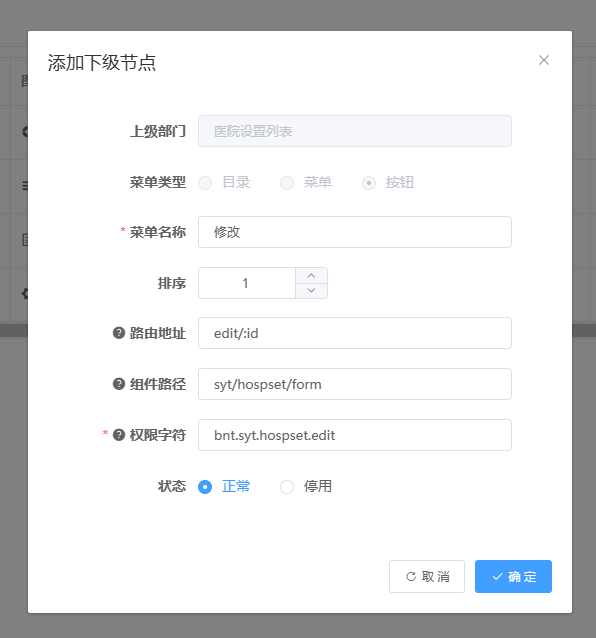
最简单的引入路由的方式就是在src/router/index.js文件中配置路由节点:将医院管理节点定义在constantRoutes数组中 // 医院管理 { path: '/syt/hospset', component: Layout, redirect: '/syt/hospset/list', name: 'HospSet', meta: { title: '医院管理', icon: 'el-icon-s-help' }, children: [ { path: 'list', name: 'HospSetList', component: () => import('@/views/syt/hospset/list'), meta: { title: '医院设置列表', icon: 'el-icon-s-unfold' } }, { path: 'create', name: 'HospSetCreate', component: () => import('@/views/syt/hospset/form'), meta: { title: '添加医院设置', icon: 'el-icon-tickets' } }, { path: 'edit/:id', name: 'HospSetEdit', component: () => import('@/views/syt/hospset/form'), meta: { title: '编辑医院设置', noCache: true }, hidden: true } ] }, 3.2、方式二:动态路由的引入也可以在之前的权限系统的菜单管理功能中添加动态的菜单和菜单项: 添加菜单:
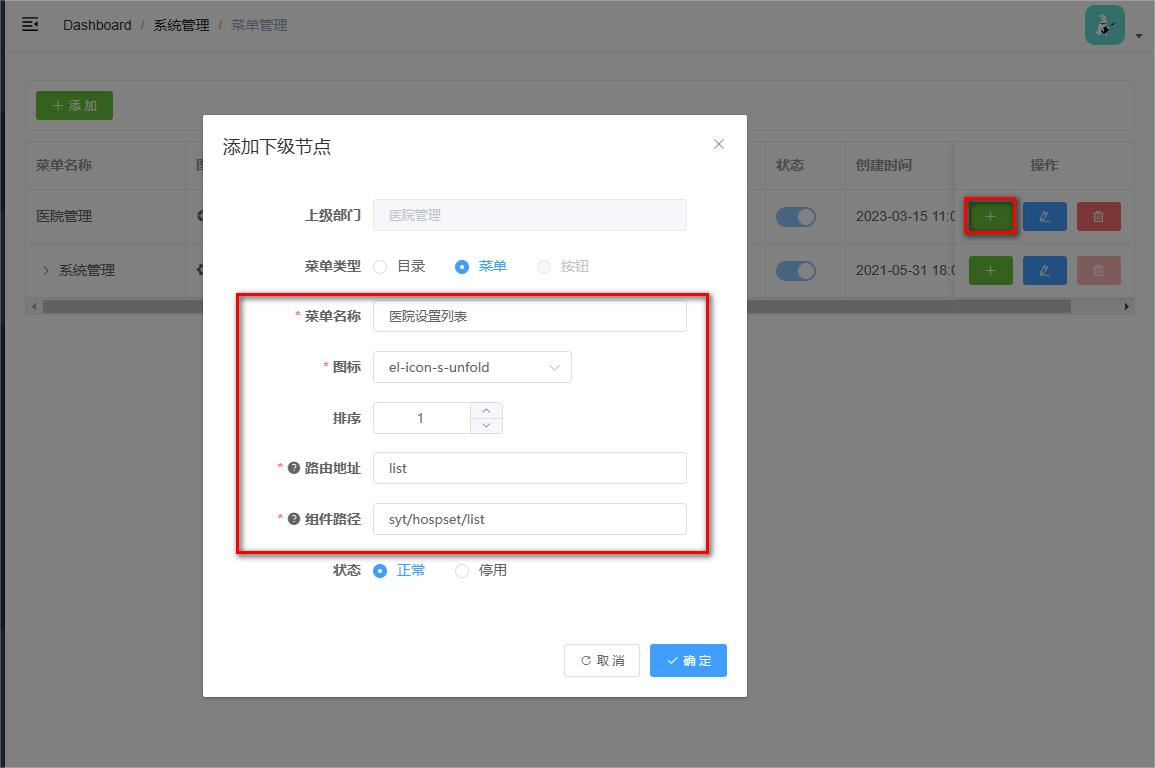
添加菜单项:
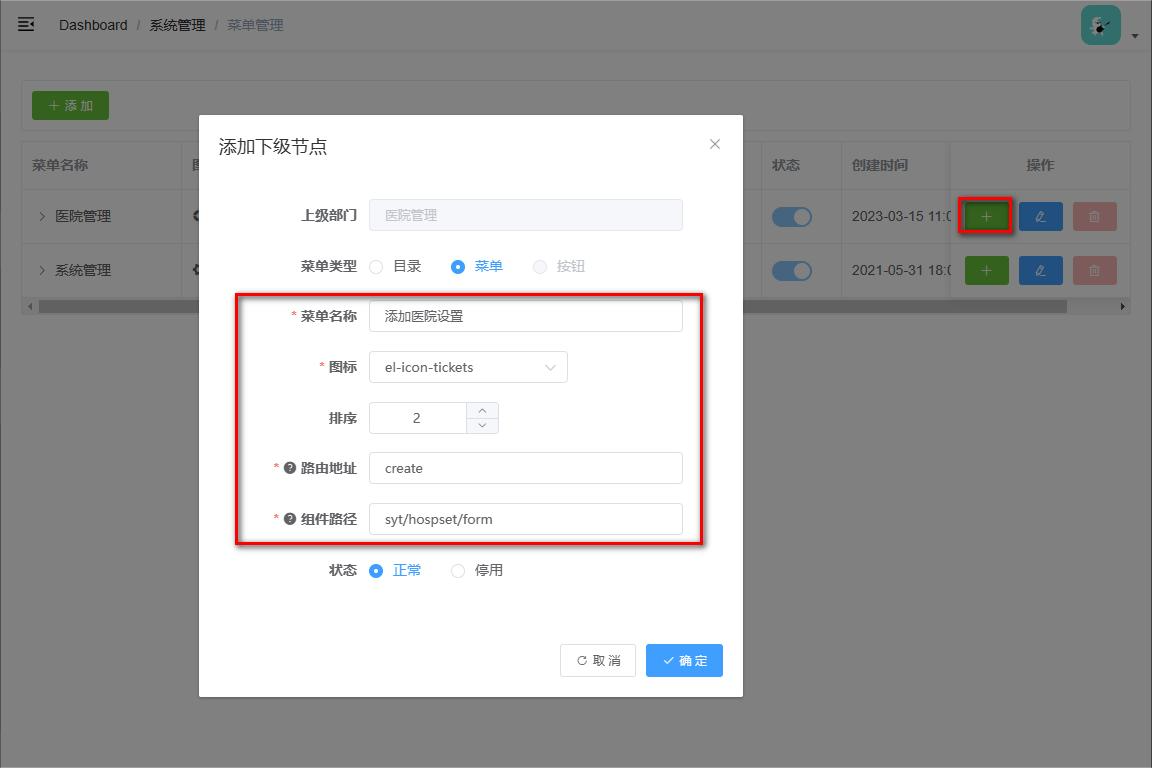
最后添加后的结果如下:
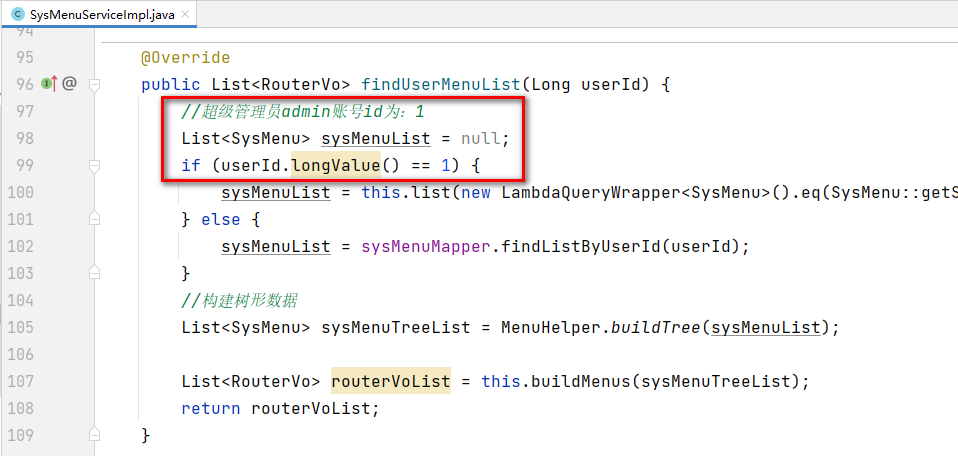
注意:系统中admin用户无需分配权限,默认拥有全部权限
前端访问多个后端service模块,可通过前端代码请求服务器端接口,配置如下: 更改文件:vue.config.js 例如: service-system模块: 端口:8800、访问路径规则:/admin/system/**service-hosp模块端口 端口:8201、访问路径规则:/admin/hosp/**配置: proxy: { '/dev-api/admin/system': { // 匹配所有以 '/dev-api/admin/system'开头的请求路径 target: 'http://localhost:8800', changeOrigin: true, // 支持跨域 pathRewrite: { // 重写路径: 去掉路径中开头的'/dev-api' '^/dev-api': '' } }, '/dev-api/admin/hosp': { // 匹配所有以 '/dev-api/admin/hosp'开头的请求路径 target: 'http://localhost:8201', changeOrigin: true, // 支持跨域 pathRewrite: { // 重写路径: 去掉路径中开头的'/dev-api' '^/dev-api': '' } } } 2、定义api创建文件 src/api/syt/hospset.js import request from '@/utils/request' const apiName = '/admin/hosp/hospitalSet' export default { //医院设置列表 getPageList(page, limit, searchObj) { return request({ url: `${apiName}/${page}/${limit}`, method: 'get', params: searchObj }) }, } 3、初始化vue组件src/views/syt/hospset/list.vue 医院设置列表 import hospsetApi from '@/api/syt/hospset' export default { data() {// 定义数据 return {} }, created() { // 当页面加载时获取数据 this.fetchData() }, methods: { fetchData() { // 调用api层获取数据库中的数据 console.log('加载列表') }, } } 4、定义data data() {// 定义数据 return { listLoading: true, // 是否显示loading信息 list: null, // 数据列表 total: 0, // 总记录数 page: 1, // 页码 limit: 10, // 每页记录数 searchObj: {}// 查询条件 } }, 5、定义methods methods: { fetchData() { // 调用api层获取数据库中的数据 console.log('加载列表') this.listLoading = true hospsetApi.getPageList(this.page, this.limit, this.searchObj).then(response => { // debugger //设置断点调试 this.list = response.data.records this.total = response.data.total this.listLoading = false }) }, }, 6、表格渲染 {{ (page - 1) * limit + scope.$index + 1 }} {{ scope.row.status===1?'可用':'不可用' }} 修改 删除 锁定 解锁 7、添加路由按钮在菜单管理中,为修改按钮添加一条记录,因为此按钮是路由形式的按钮,必须配置动态路由,才能正确的加载到前端页面中。
在table组件下面添加分页组件 2、改变每页条数为组件注册事件 @size-change="changePageSize"定义事件脚本 // 每页记录数改变,size:回调参数,表示当前选中的“每页条数” changePageSize(size) { this.limit = size this.fetchData() }, 3、翻页为组件注册事件 @current-change="changeCurrentPage"定义事件脚本 // 改变页码,page:回调参数,表示当前选中的“页码” changeCurrentPage(page) { this.page = page this.fetchData() }, 第04章-查询表单 1、html在table组件上面添加查询表单 查询 清空 2、查询方法 //查询数据 searchData() { this.page = 1 this.fetchData() }, 3、清空方法 //清空查询 resetData() { this.page = 1//重置页码 this.searchObj = {}//清空查询条件 this.fetchData()//重置列表数据 }, 第05章-删除 1、定义apisrc/api/syt/hospset.js removeById(id) { return request({ url: `${apiName}/${id}`, method: 'delete' }) }, 2、定义methodssrc/views/syt/hospset/list.vue 使用MessageBox 弹框组件 removeDataById(id) { // debugger // console.log(memberId) this.$confirm('此操作将永久删除该记录, 是否继续?', '提示', { type: 'warning', }).then(() => { hospsetApi.removeById(id).then(response => { this.fetchData() this.$message.success(response.message) }) }).catch(() => { this.$message.info('已取消删除') }) }, 第06章-新增 1、定义apisrc/api/syt/hospset.js save(hospset) { return request({ url: apiName + '/saveHospSet', method: 'post', data: hospset }) }, 2、初始化组件src/views/syt/hospset/form.vue html 保存js export default { data() { return { hospset: {}, saveBtnDisabled: false // 保存按钮是否禁用, } }, methods: { saveOrUpdate() { this.saveBtnDisabled = true this.saveData() }, // 保存 saveData() { } } } 3、实现新增功能引入api模块 import hospsetApi from '@/api/syt/hospset'完善save方法 // 保存 saveData() { hospsetApi.save(this.hospset).then(response => { this.$message.success(response.message) this.$router.push({ path: '/syt/hospset/list' }) }) },思考:优化后端接口的错误处理(处理编号重复) @ApiOperation(value = "新增医院设置") @PostMapping("saveHospSet") public Result save( @ApiParam(value = "医院设置对象", required = true) @RequestBody HospitalSet hospitalSet){ try { //设置状态 1可用 0锁定 hospitalSet.setStatus(1); //生成签名秘钥 Random random = new Random(); hospitalSet.setSignKey(MD5.encrypt(System.currentTimeMillis()+""+random.nextInt(1000))); boolean result = hospitalSetService.save(hospitalSet); if(result){ return Result.ok().message("添加成功"); }else{ return Result.fail().message("添加失败"); } } catch (DuplicateKeyException e) { throw new GuiguException(ResultCodeEnum.HOSCODE_EXIST, e); } catch (Exception e) { throw new GuiguException(ResultCodeEnum.FAIL, e); } } 第07章-回显 1、定义apisrc/api/syt/hospset.js getById(id) { return request({ url: `${apiName}/getHospSet/${id}`, method: 'get' }) }, 2、组件中调用apimethods中定义fetchDataById: // 根据id查询记录 fetchDataById(id) { hospsetApi.getById(id).then(response => { this.hospset = response.data }) }, 3、调用fetchDataById定义生命周期方法: created() { console.log('created') if (this.$route.params.id) { this.fetchDataById(this.$route.params.id) } }, 第08章-更新 1、定义api updateById(hospset) { return request({ url: `${apiName}/updateHospSet`, method: 'put', data: hospset }) }, 2、组件中调用apimethods中定义updateData // 根据id更新记录 updateData() { hospsetApi.updateById(this.hospset).then(response => { this.$message.success(response.message) this.$router.push({ path: '/syt/hospset/list' }) }) }, 3、完善saveOrUpdate方法 saveOrUpdate() { this.saveBtnDisabled = true if (!this.hospset.id) { this.saveData() } else { this.updateData() } }, 第09章-批量删除 1、定义apisrc/api/syt/hospset.js removeRows(idList) { return request({ url: `${apiName}/batchRemove`, method: 'delete', data: idList }) }, 2、批量删除按钮src/views/syt/hospset/list.vue 在列表页的table组件上方添加 批量删除 按钮 批量删除 3、定义复选框和事件在table组件上添加@selection-change 和 复选框列 data定义数据 multipleSelection: [], // 批量选择中选择的记录列表 4、实现批量删除完善方法 // 当表格复选框选项发生变化的时候触发 handleSelectionChange(selection) { this.multipleSelection = selection }, //批量删除 removeRows() { if(this.multipleSelection.length == 0){ this.$message.warning('请选择要删除的记录') return } this.$confirm('此操作将永久删除医院设置信息, 是否继续?', '提示', { type: 'warning', }).then(() => { //确定执行then方法 var idList = [] this.multipleSelection.forEach((item) => { idList.push(item.id) }) //调用接口 hospsetApi.removeRows(idList).then((response) => { //提示 this.$message.success(response.message), //刷新页面 this.fetchData() }) }).catch(() => { this.$message.info('已取消删除') }) }, 第10章-锁定和解锁 1、定义apisrc/api/syt/hospset.js //锁定和取消锁定 lockHospSet(id, status) { return request({ url: `${apiName}/lockHospitalSet/${id}/${status}`, method: 'put' }) }, 2、编写调用方法在list.vue页面添加方法: //锁定和取消锁定 lockHostSet(id, status) { hospsetApi.lockHospSet(id,status).then(response => { //刷新 this.fetchData() }) },源码:https://gitee.com/dengyaojava/guigu-syt-parent 本文来自博客园,作者:自律即自由-,转载请注明原文链接:https://www.cnblogs.com/deyo/p/17475897.html |


【本文地址】
| 今日新闻 |
| 推荐新闻 |
| 专题文章 |